
How to Set-up
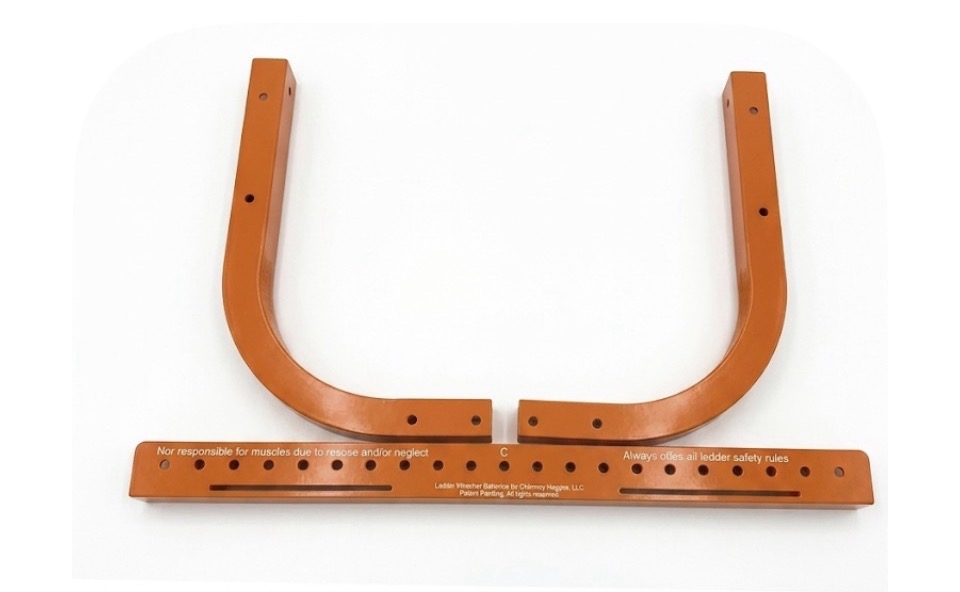
First determine the width of the chimney and then set the arms al little wider to ensure that when you set the ladder up arms will be on both sides of the chimney. In the instructions you will find charts that will show you where to locate the arms to get the closes to that dimension. For an example let’s say the width of the is 18″. If you take a look at the chart below the smallest dimension is 20″. To get to the 18″ you will need to use the push screws. But first let’s look at the holes on the main body, there are 21 holes across the top through the channel and threaded holes on the back for the push screws. Looking at the chart below the letter “C” is the center hole and then you will have 10 holes on each side.

There are 3 different charts
- 16″ to 37″
- 36″ to 55″
- 54″ to 73
Back to our example the picture below shows you that to get the 20″ you only need the 2 arms (no extensions) and the way they attach to the main body.
| Chimney width (inches) | Pin holes | Push screw location |
| 20 | 1-3 | 2 |
| 22 | 2-4 | 3 |
| 24 | 3-5 | 4 |
| 27 | 4-6 | 5 |
| 30 | 5-7 | 9 |
| 32 | 6-8 | 9 |
| 35 | 7-9 | 10 |
| 37 | 8-10 | 9 |
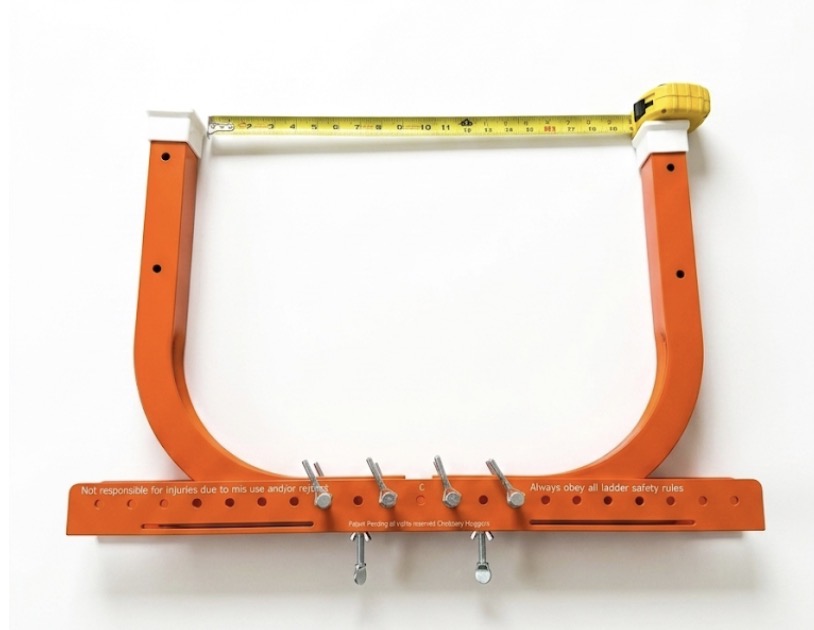
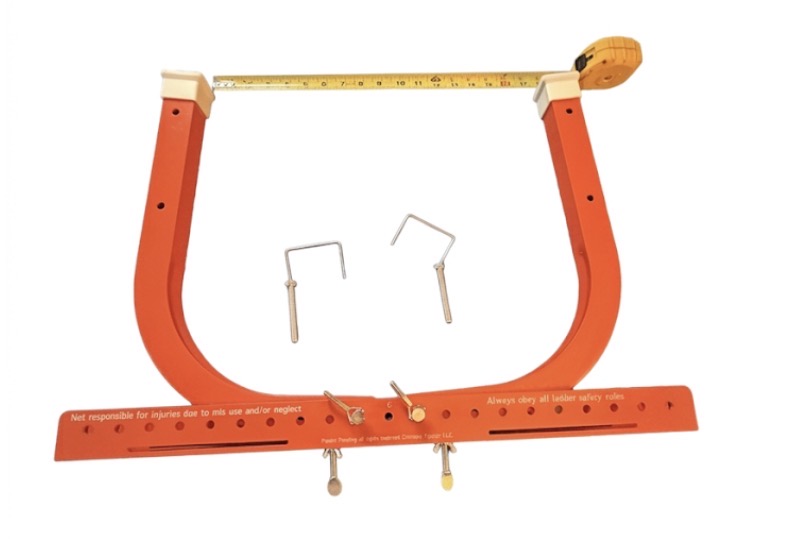
To get 20″ you will used holes 1 and 3 for each arm. (Note when setting up always use 4 hitch pins to keep the arm from swinging while setting up your ladder). Also show you where to put the push screws. (Recommended for dimension under 30″) The next picture shows the 4 hitch pins in place. At this point mount the unit to the ladder. (See mounting instructions below.) After unit is mounted to the ladder, set-up the ladder against the chimney with an arm on each side. When you have the ladder safe to climb, climb up to the unit and remove the 2 outer hitch pins. (In this example it would be the pins in hole 3.) And then turn the push screws in until the arms touch the side of the chimney. Tighten the locking wing nuts will lock the push screws into position. The picture below shows the pins out and the push screws turned in. Again, this is done after the ladder is set up.
Mounting Instructions
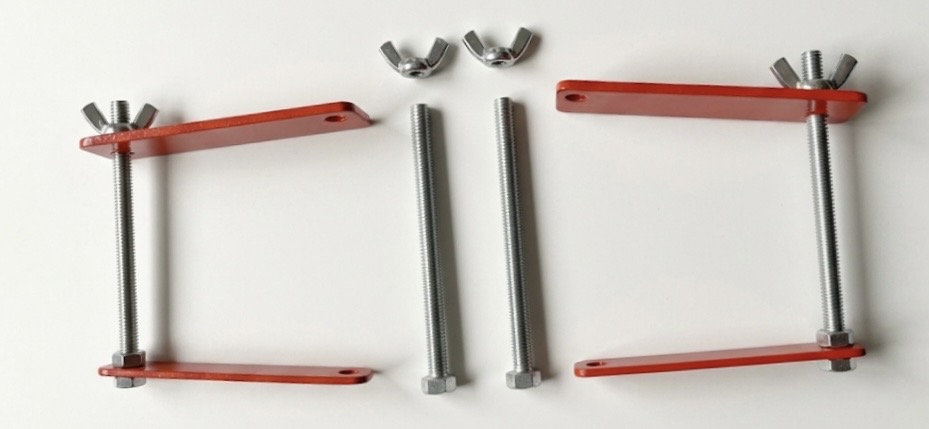
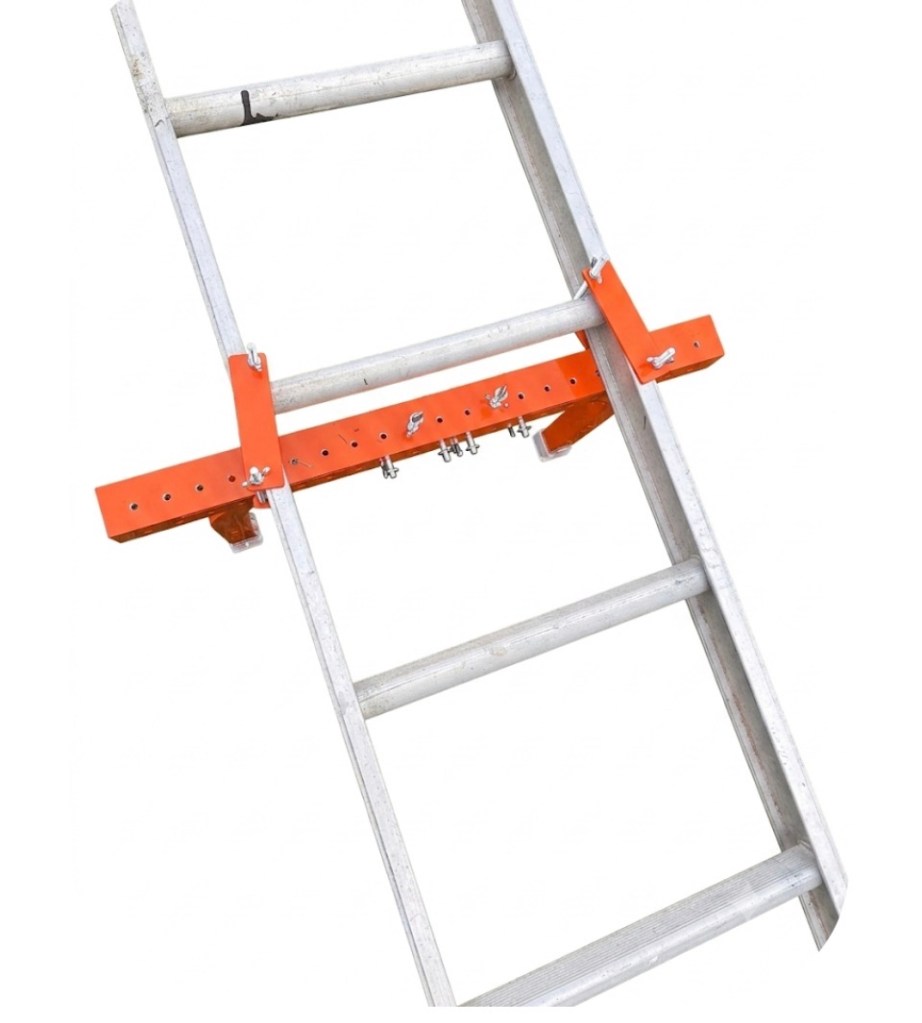
After you assembled the unit, with the ladder laying on the ground put the unit under the ladder like you would a ladder stabilizer. Position the unit just below the rung you want to mount it to, so that the push screws are protected under the rung. Using the mounting brackets slide the thinner side (1/8 inch thick) into the slots on the main body. With top bolts resting on the top of the rung against the inside of the ladder rails. The bottom bolts to the outside of the ladder rails. Move the unit so that the main body is resting against the bolts and then tighten the wing nuts.

